If you have a need for Database for your application, one way you can create Database is using EC2 instance and installing Database server on it, and it is your responsibility to manage it, for example making sure it is highly available, taking backups and installing Database and Operating System patches etc. Since RDS is a AWS managed service, majority of the management tasks are taken care by AWS.
As of writing this article, AWS supports six different database engines through RDS service, that includes MySQL, PostgreSQL, Oracle, SQL Server, Amazon Aurora, and MariaDB.
What benefits does RDS provide? How to launch an RDS instance from AWS console
- AWS RDS service takes care of managing backups, software patching, automatic failure detection,failover, and recovery.
- With RDS, you can get high availability with two instances, one being the primary and the other being the secondary standby instance with synchronous physical replication of the primary instance.
- You can also setup read replicas, to reroute read heavy tasks such as queries for reporting data from database etc. Once the data is written to primary database, it copies that data to read replica database instance in an asynchronous fashion, so you can expect almost real time, but keep in mind that they may be some lag between primary database and read replica.
- Since majority of the database tasks are automated, it is less prone to user errors.
- Using AWS RDS Custom for Oracle and Microsoft SQL Server, It is also possible to have to take shared responsibility on some of the tasks in terms of patching database, underlying O/S patching, scalability etc. incase if there are any legacy reasons such as legacy application code required that the database should run with specific version of Software etc.
For more information and FAQ's on AWS RDS, please refer to this link
In this article we are going to setup MySQL, which is one of the popular open source database.
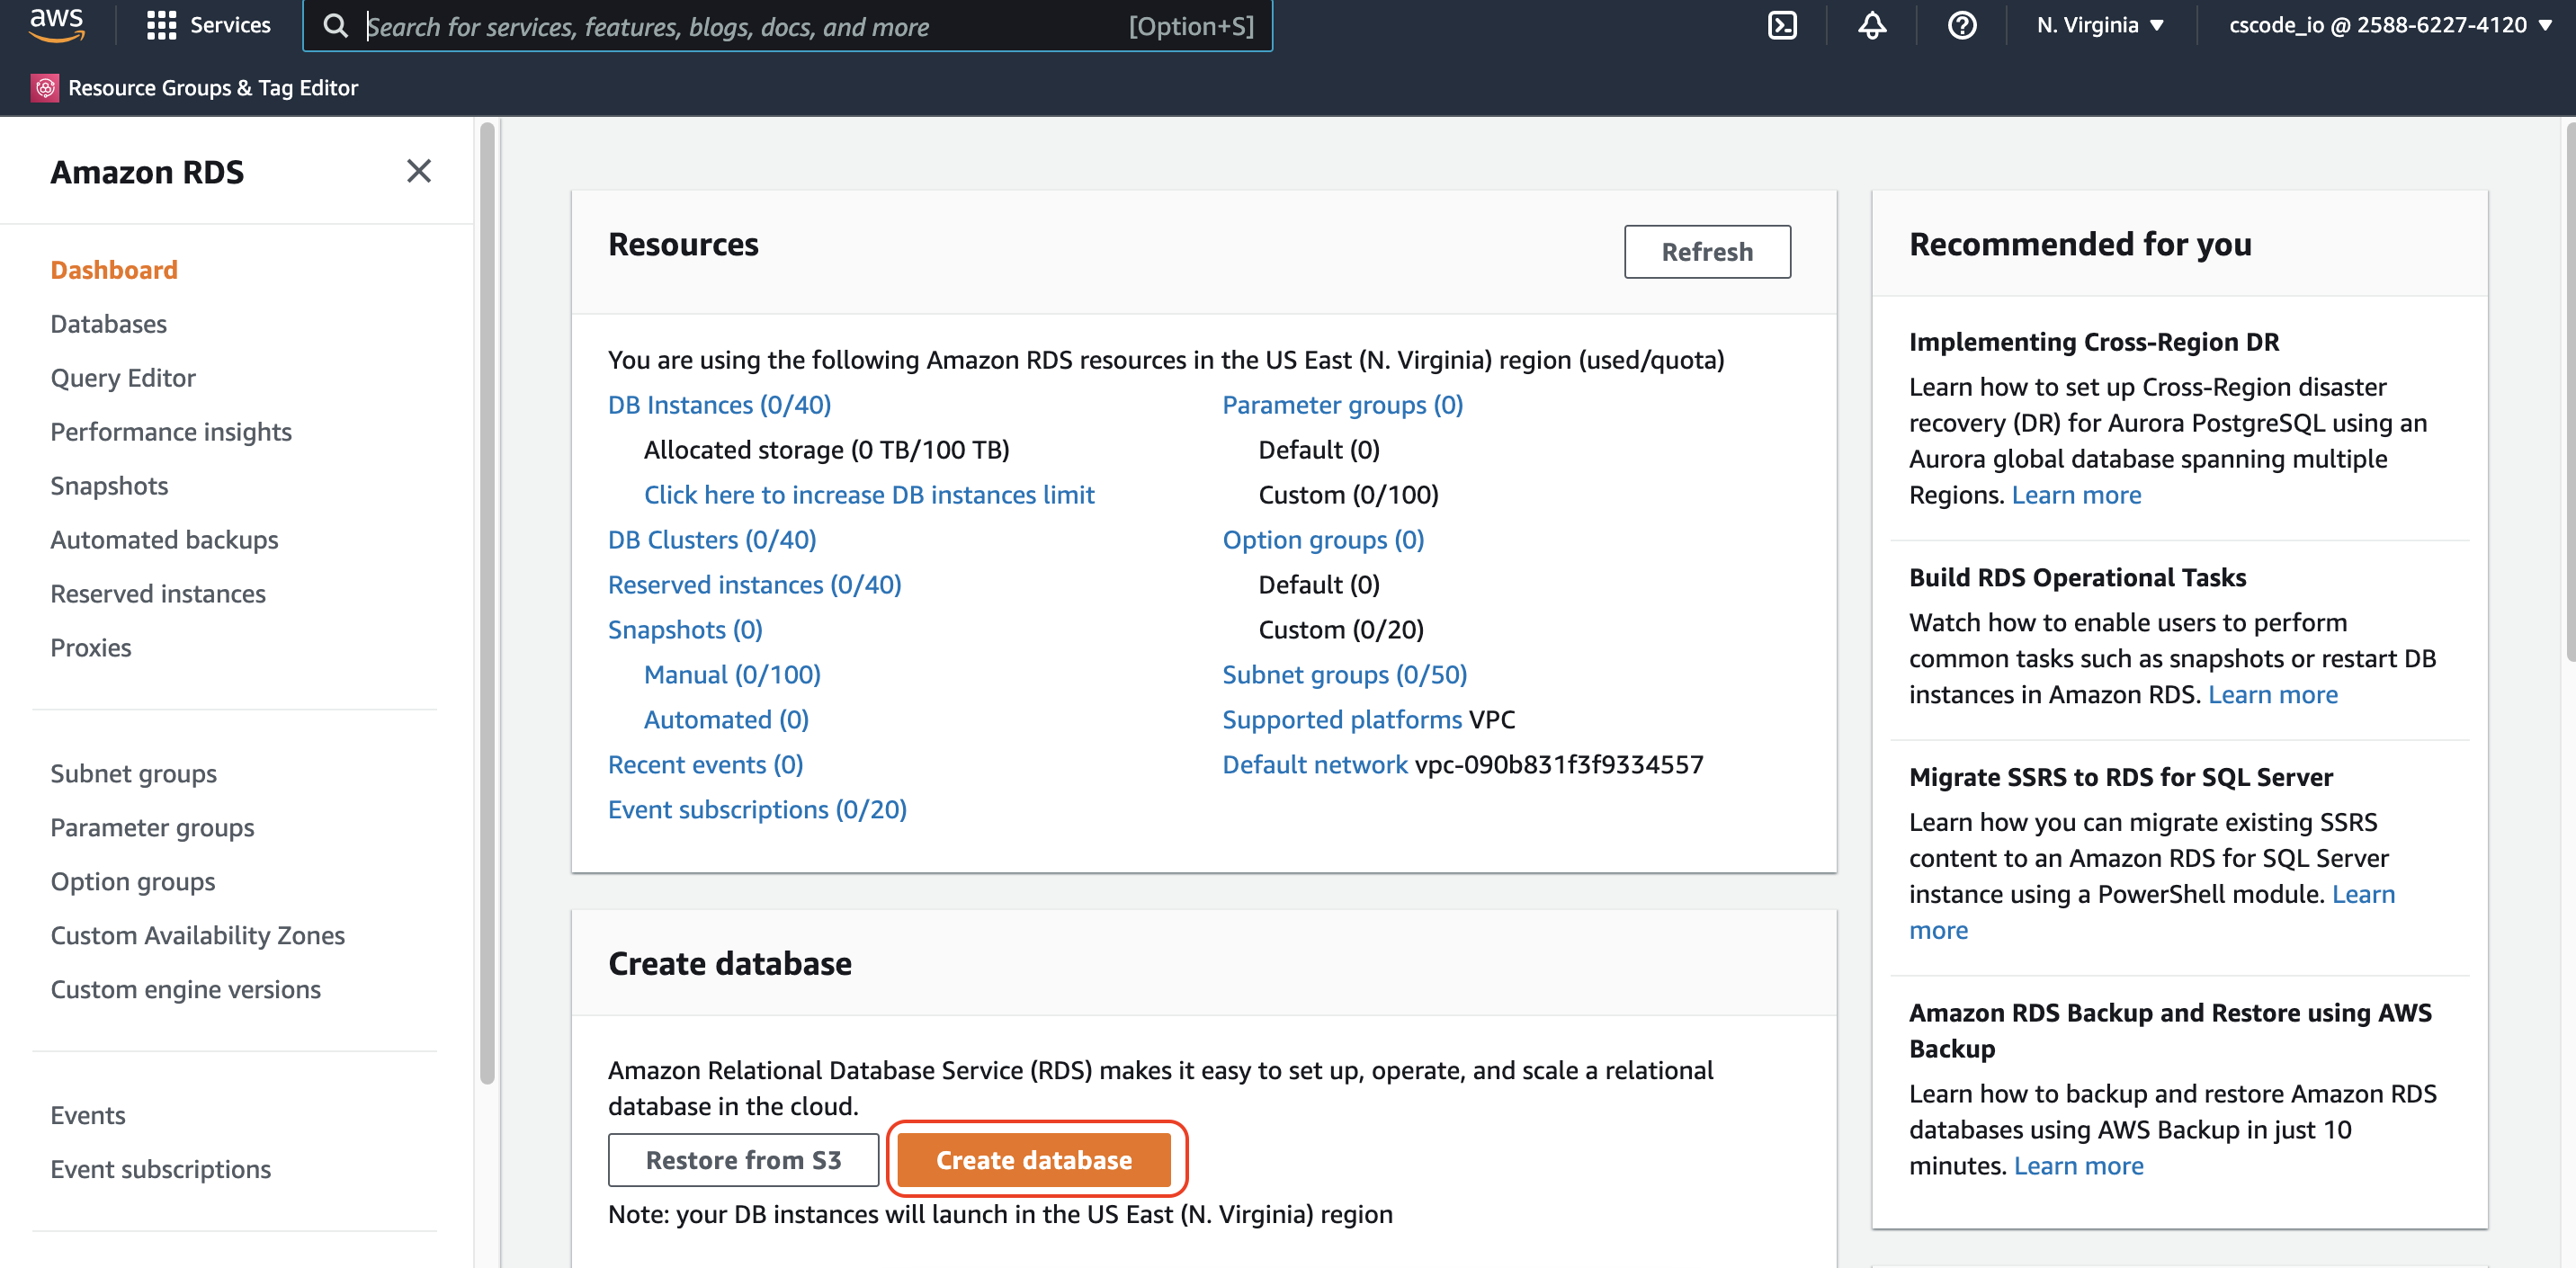
- Navigate to Amazon RDS Dashboard and click on Create database.
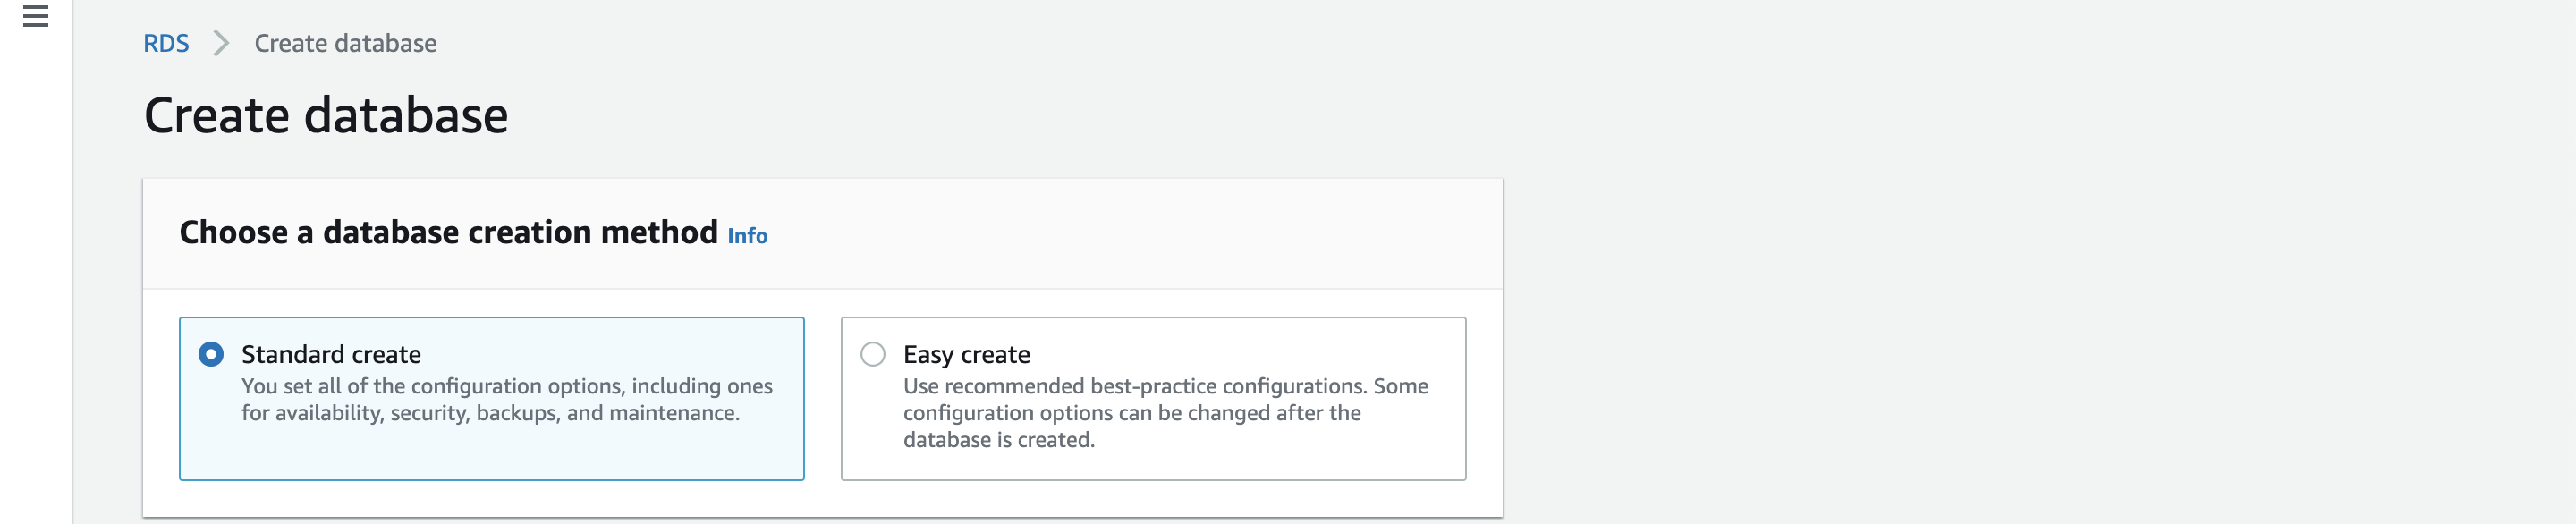
- In the next step we have to choose database creation method, and there are two options here.
- Standard create: This option allows you to select database configuration settings as you wish.
- Easy create: This option will choose best-practice recommended settings for the database type you are going to select.
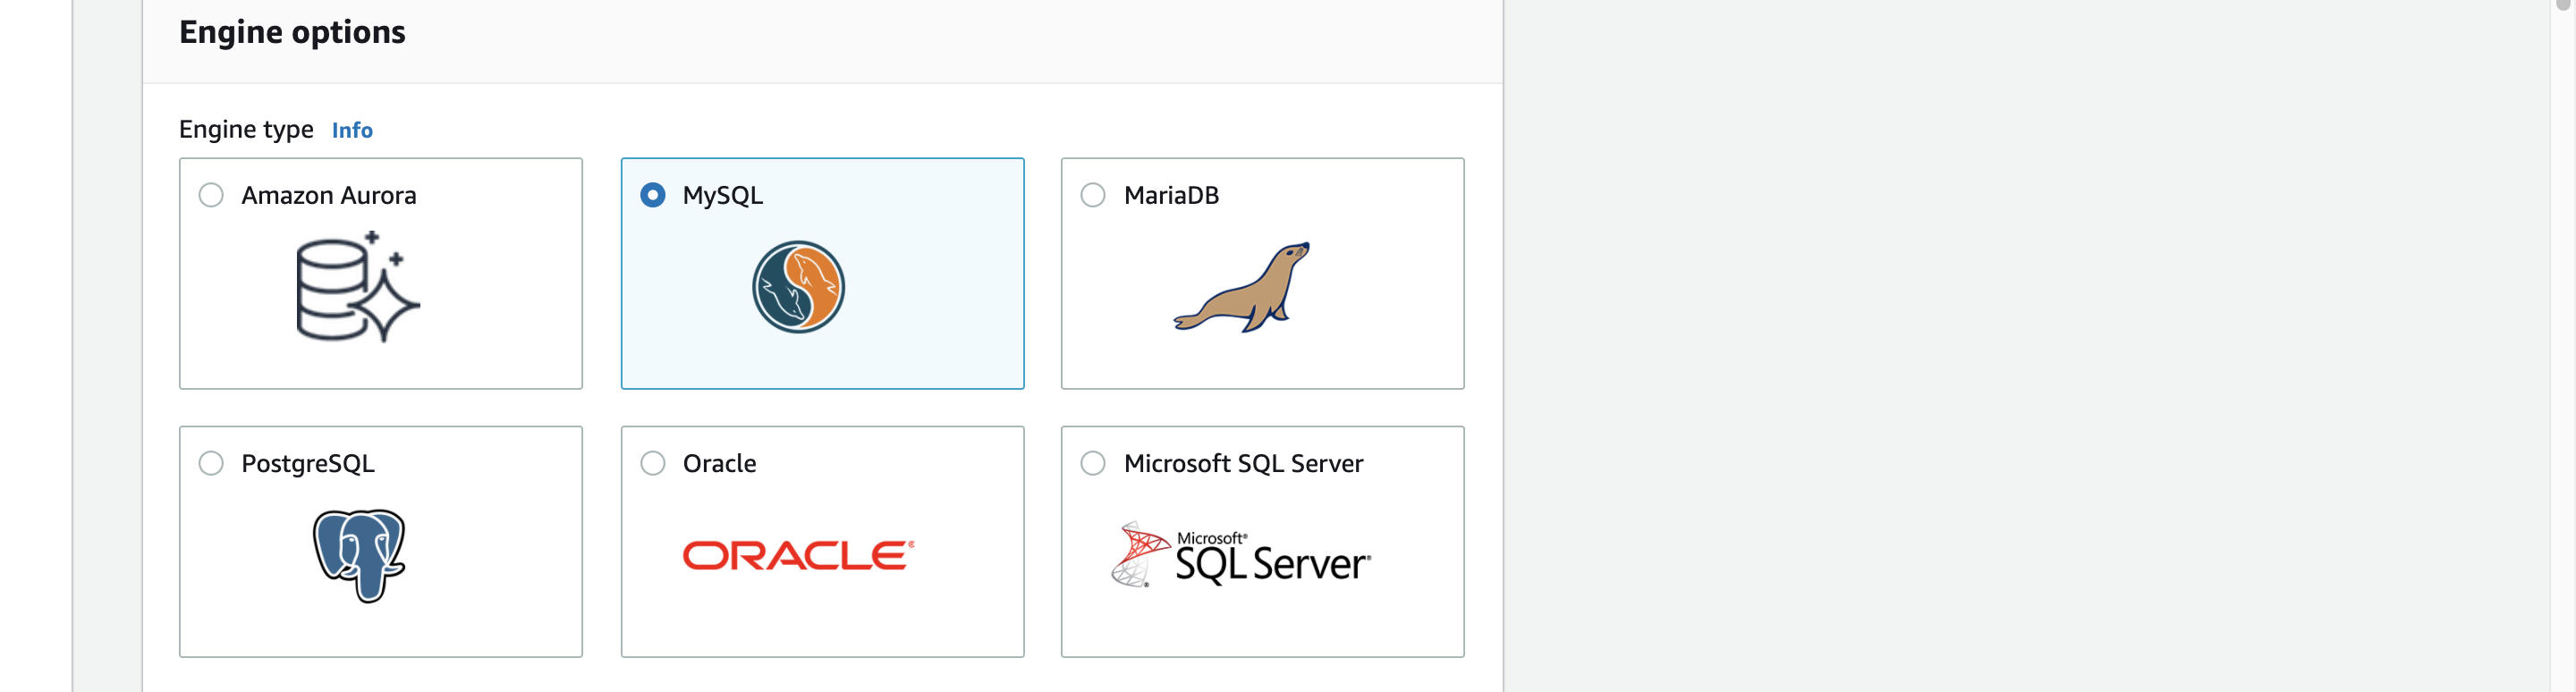
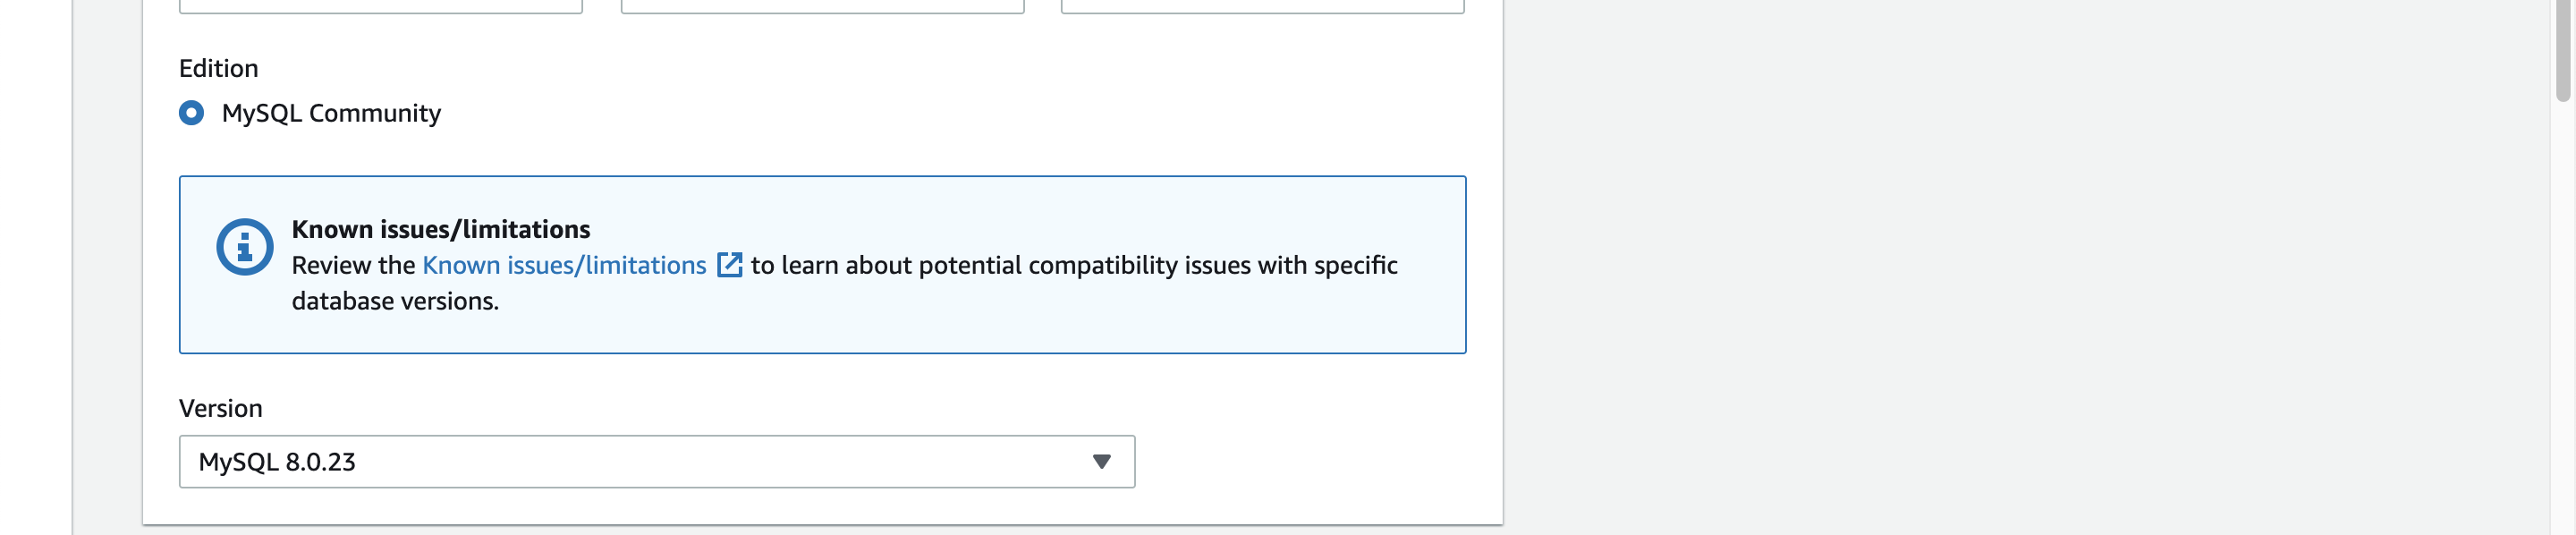
- Under Engine options, choose the database engine as MySQL.
- In this step, choose the database version that wish to use, in this setup we are selecting the latest version available.
-
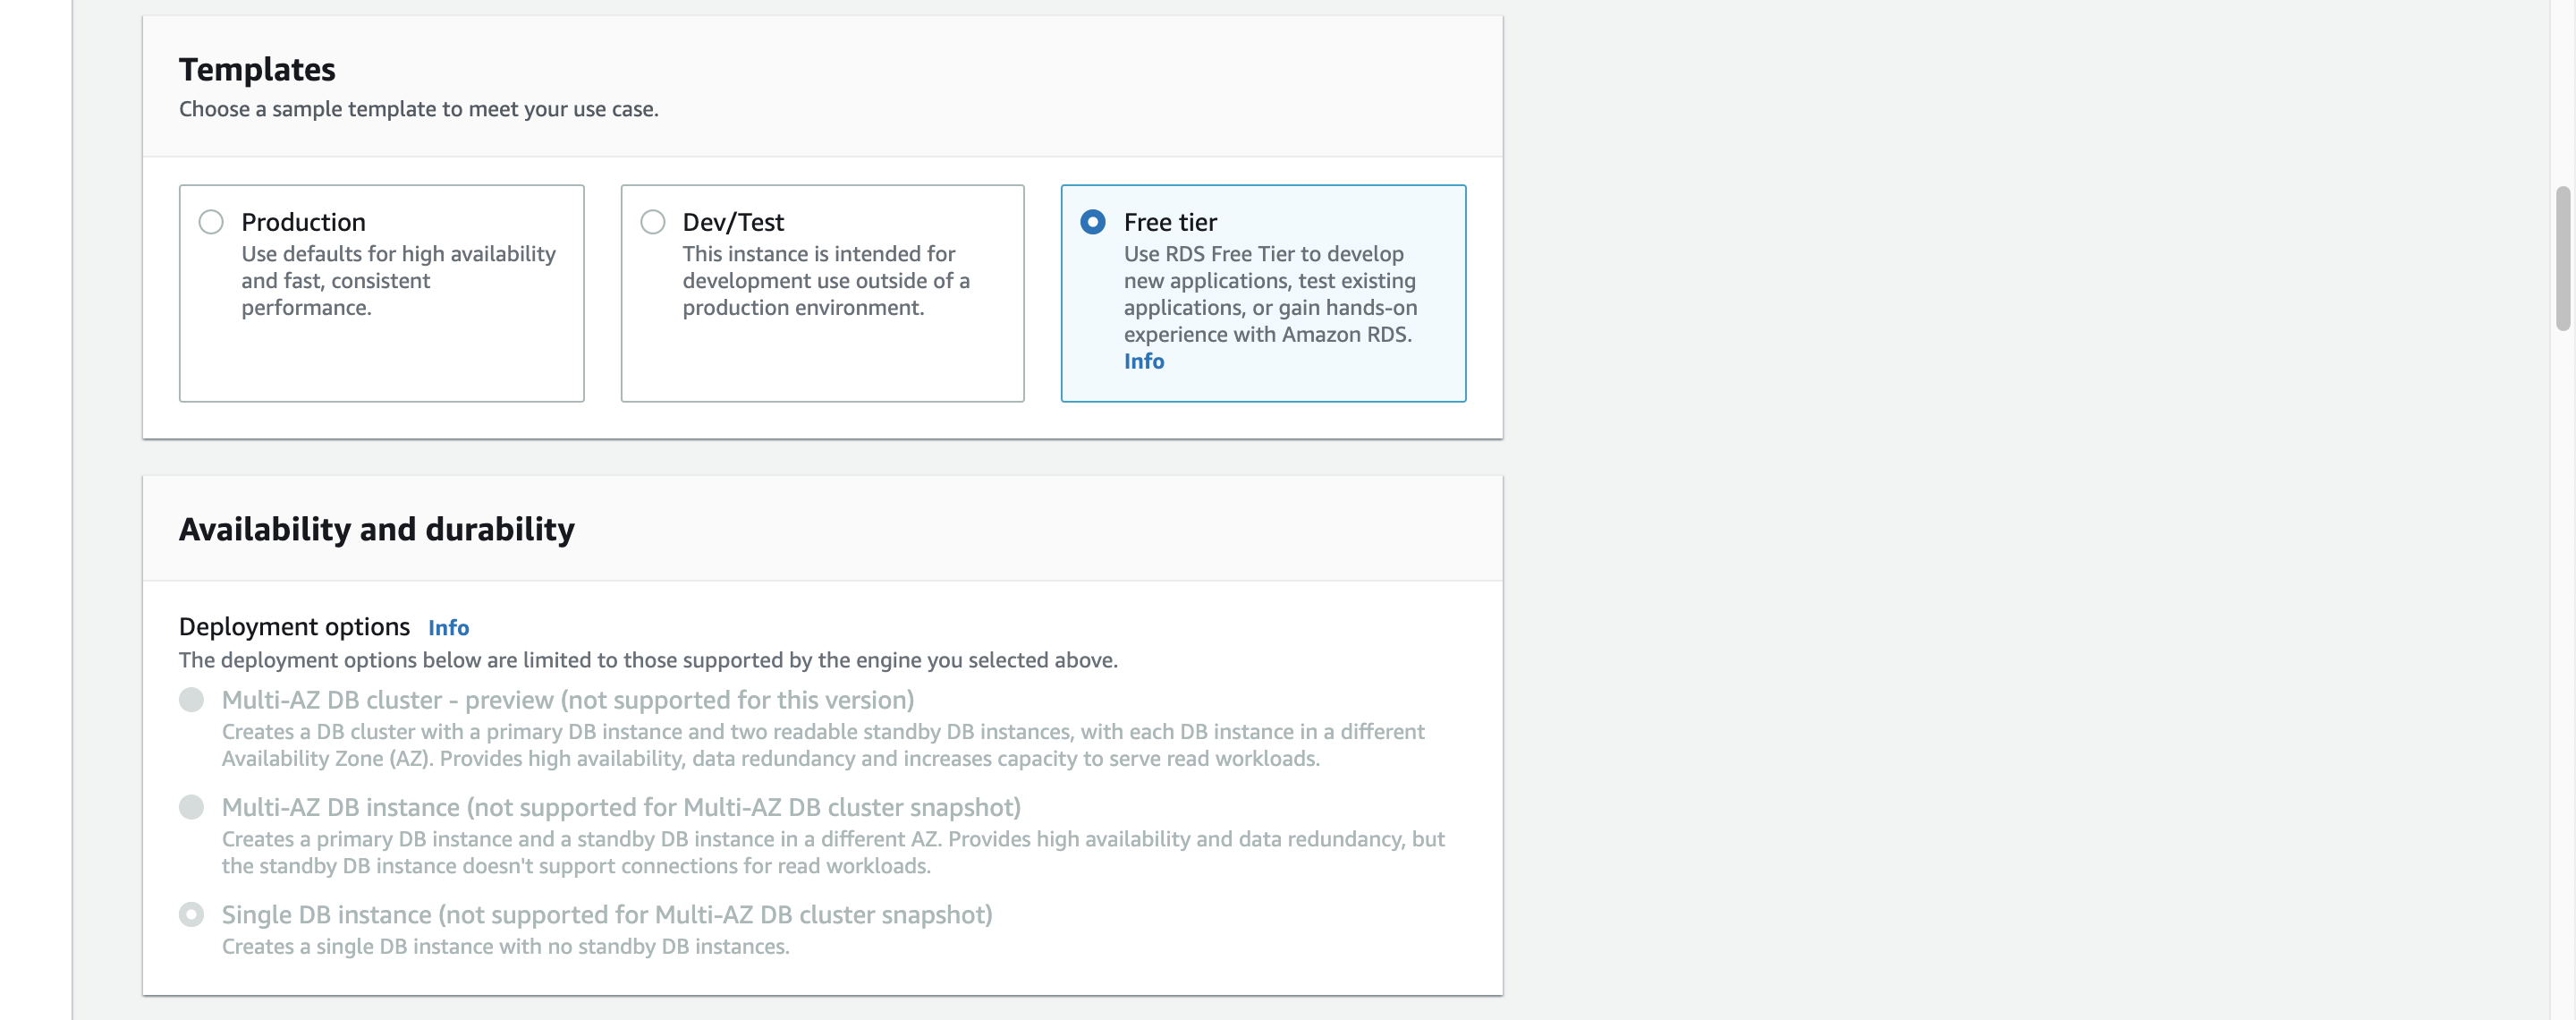
Under Templates section, we have to select a template. A template is nothing but a configuration to be applied on database setup,
for example if it is for production usage, then you may want to use Multi-AZ setup for high availability, and if the database is for development
then you may be fine with one database instance to reduce the costs.
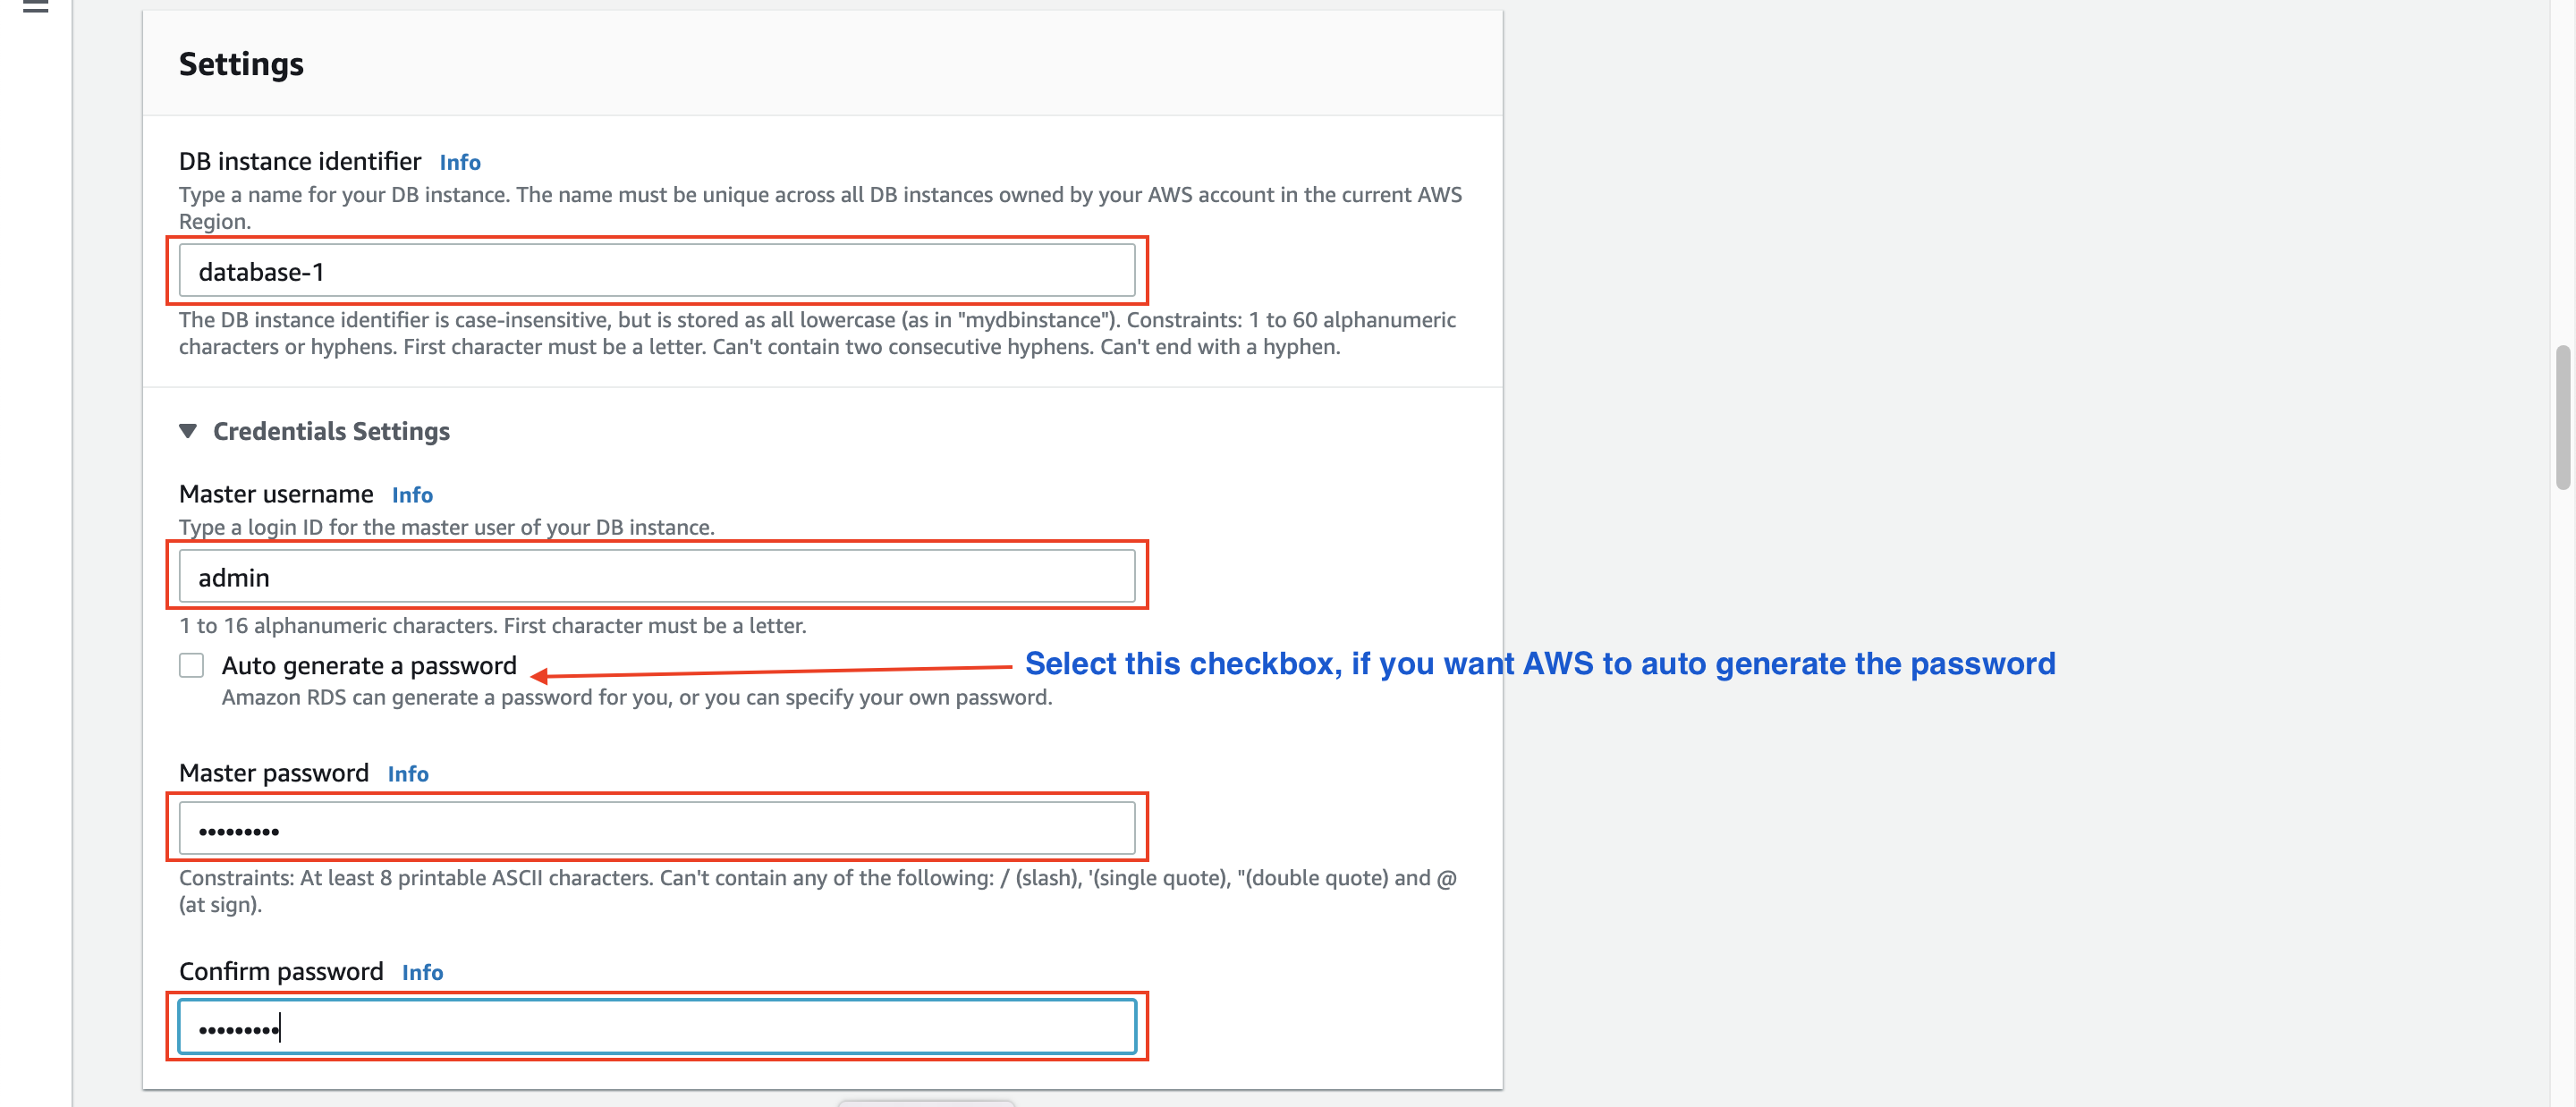
In this example setup I'm using Free tier, but for your setup use appropriate one. - Under Settings section, specify a database instance name (this should be unique across your AWS account), and a master user name and password to login into database.
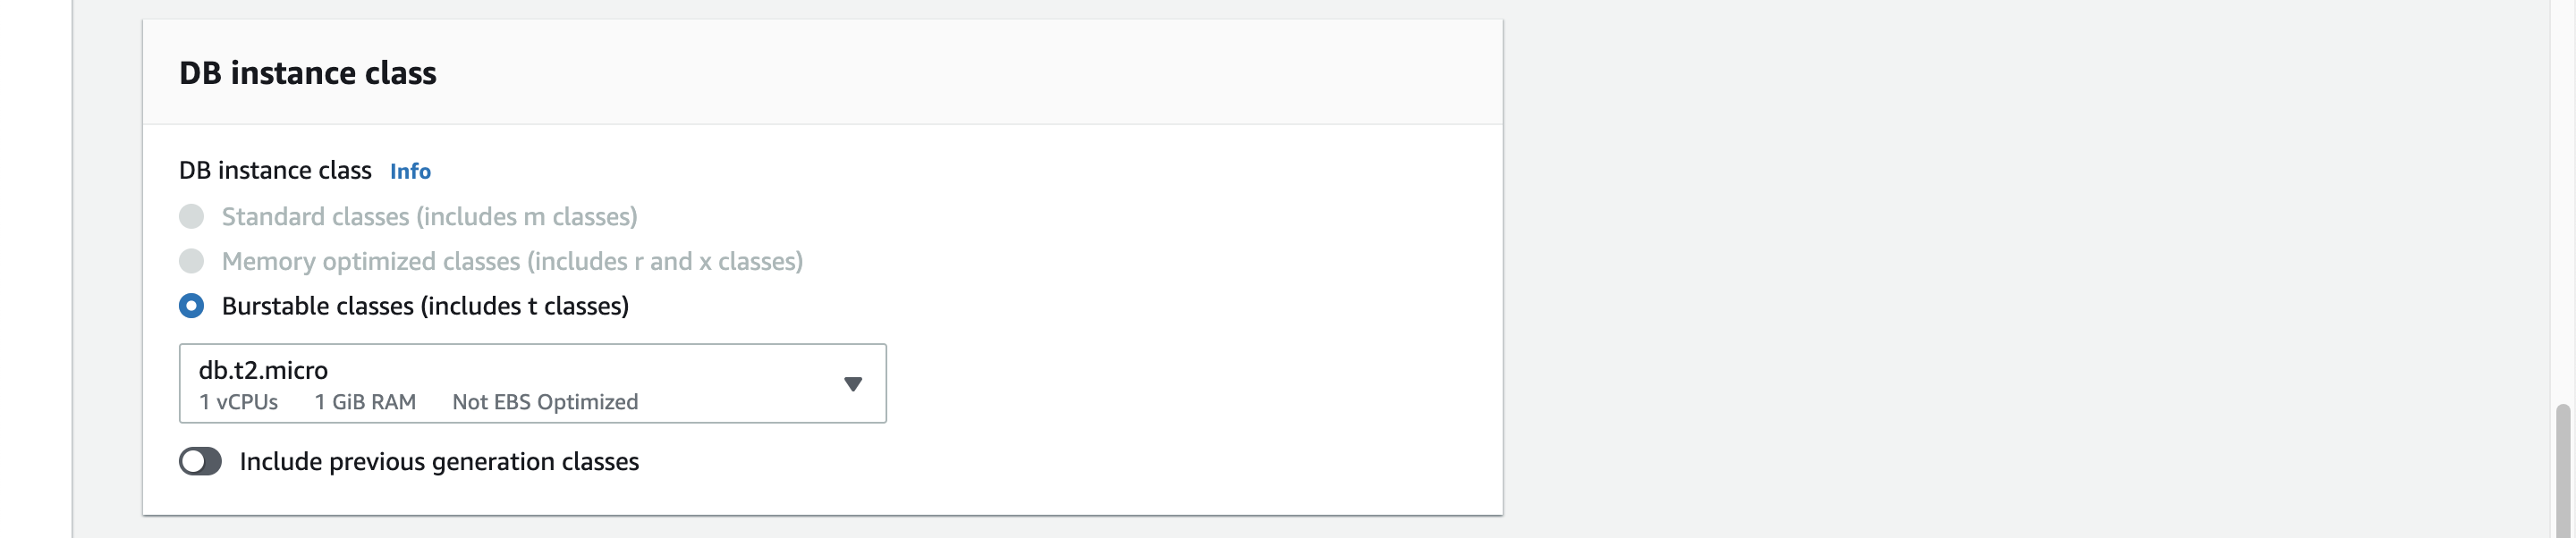
- Under DB instance class section, select the instance configuration that you want, like how many CPUs you want, how much RAM is required, and network speed to handle database load.
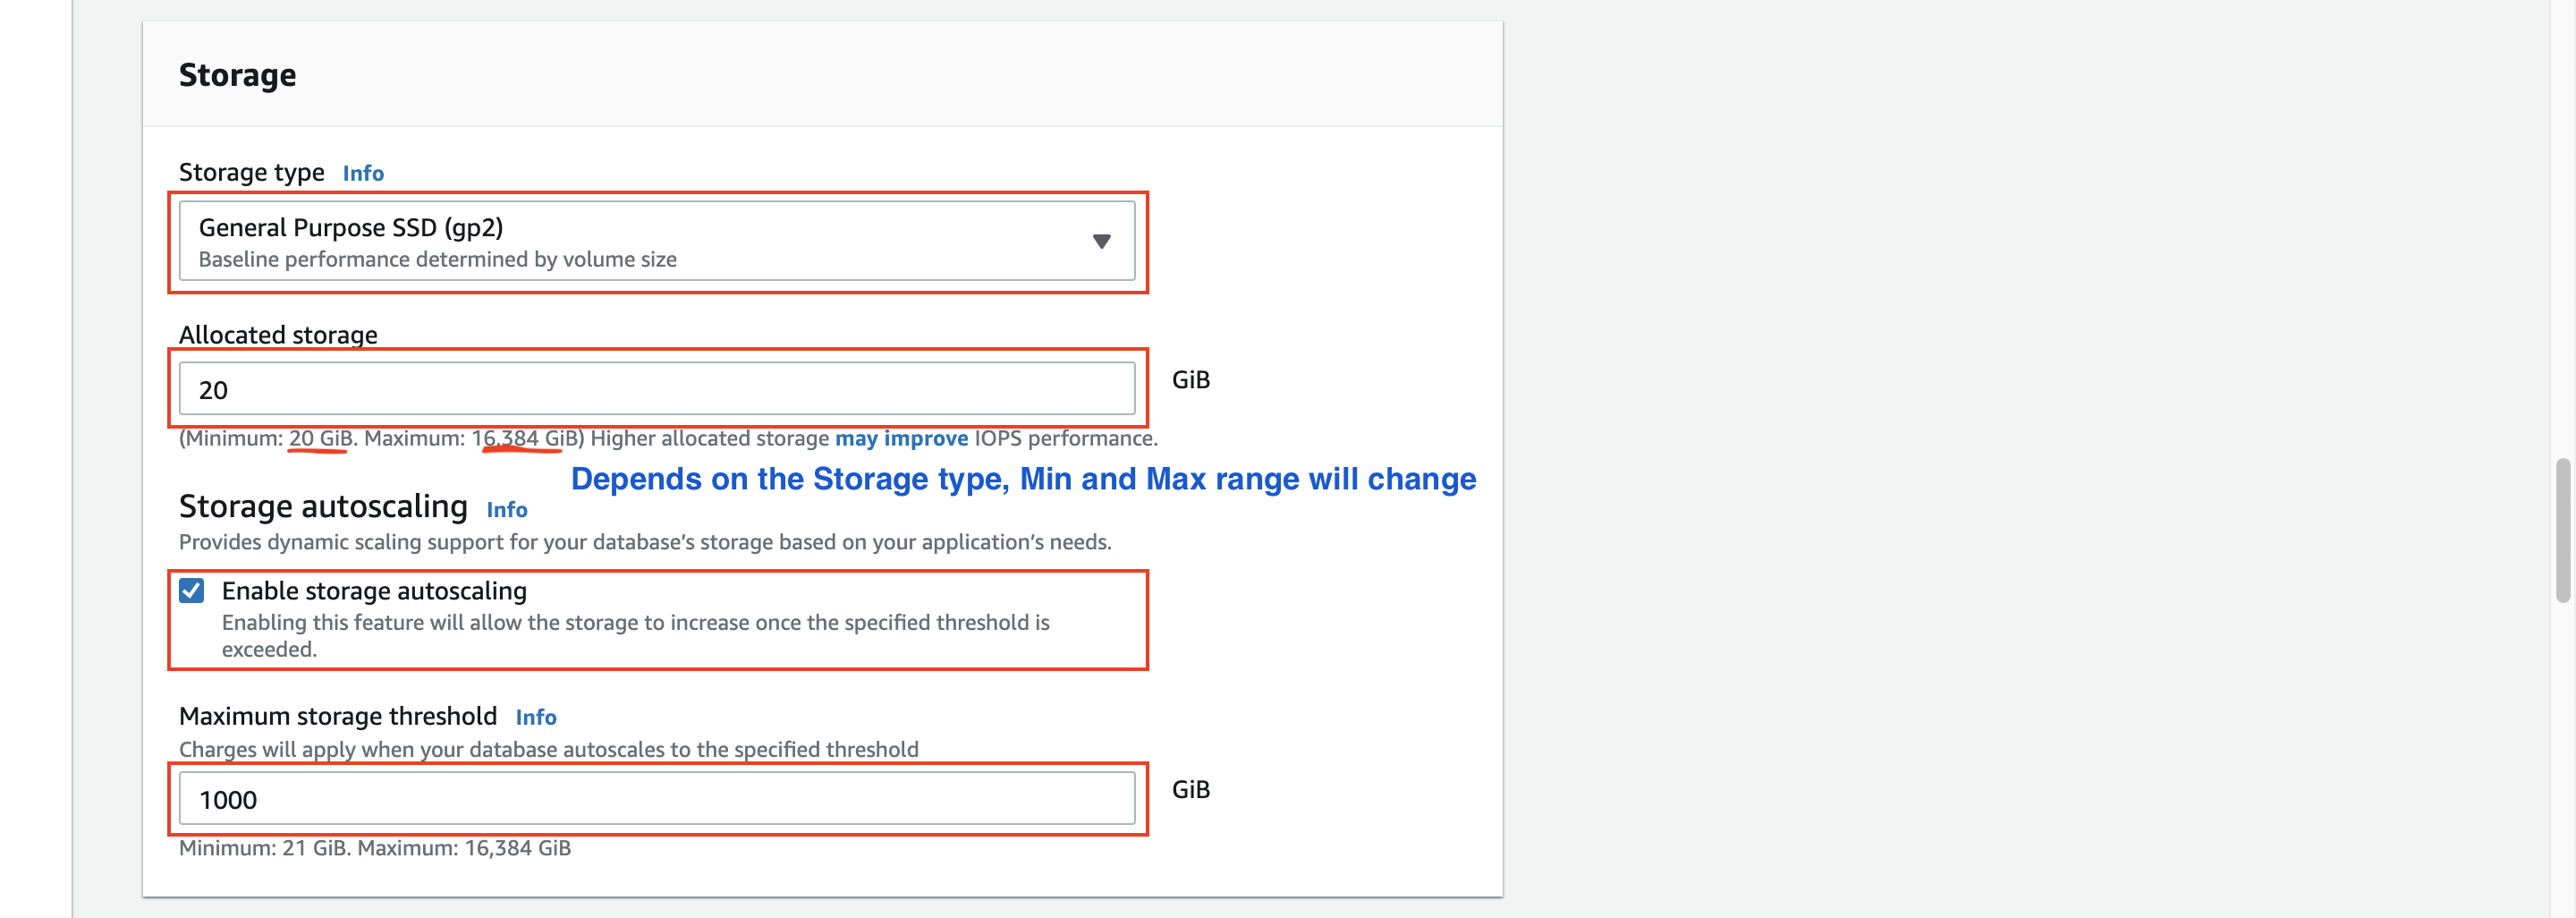
- Under Storage section, select the storage options for the database.
- Storage type: Choose what type of storage suits best for the database, this really depends on the rate at which read/write will happen from you application and the latency you can live with. If you want faster read and write you can select standard SSD, or SSD with provisioned IOPS, and if you are not concerned much about read and write speed then Magnetic tape storage may suffice the need (Note that it is not recommended to use Magnetic storage for relational databases these days).
- Allocated storage: This is the initial storage size for the database to start with. Storage size has a minimum and maximum range that you can specify here, in case if you require more storage to be added, then you can enable Storage autoscaling option and specify Maximum storage threshold , so when storage size reaches the threshold, it then automatically add more storage to it.
- Under Connectivity section, select below options for accessing it and apply security permissions around database.
- Virtual private cloud (VPC): Select the VPC where you want the database to be created, once the database is created under one VPC, we cannot change it later.
- Subnet group: Select either an existing DB subnet group if you have already created one (or) you can create a new one from here using the the option Create new DB Subnet group. DB Subnet Group is typically a group of subnets designated for DB instances.
- Public Access: You can restrict whether you want to access this database from internet directly or not. It is recommended that you never let public access to database.
- VPC security group: Select VPC security groups to allow access to this database, from your application or from other AWS services etc.
- Availability Zone: You can select an availability zone (AZ) if you want this database to be created in a specific AZ, otherwise you can let AWS decide that.
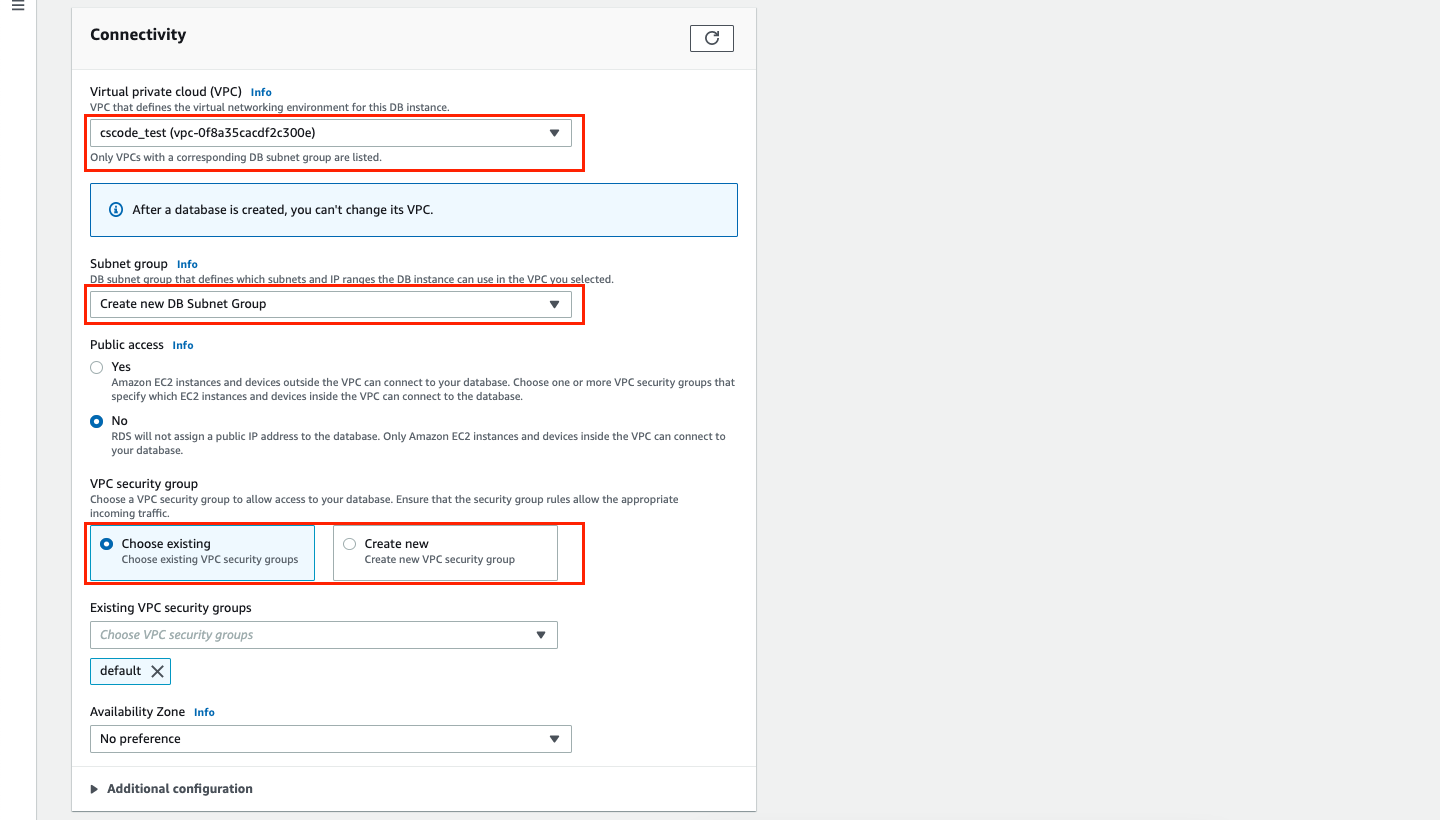
- Expand Additional configuration under connectivity and check the default port number, leave as it is or change it, if you prefer to use a different port number.
- Under Database authentication option, select which type of authentication you want to allow on this database. Password only, password and IAM roles based authentication, or password and kerberos.
- Next, expand Additional configuration and check below default options and change as you like. These options will vary based on the DB template you choose (Production, Dev/Test, or FreeTier).


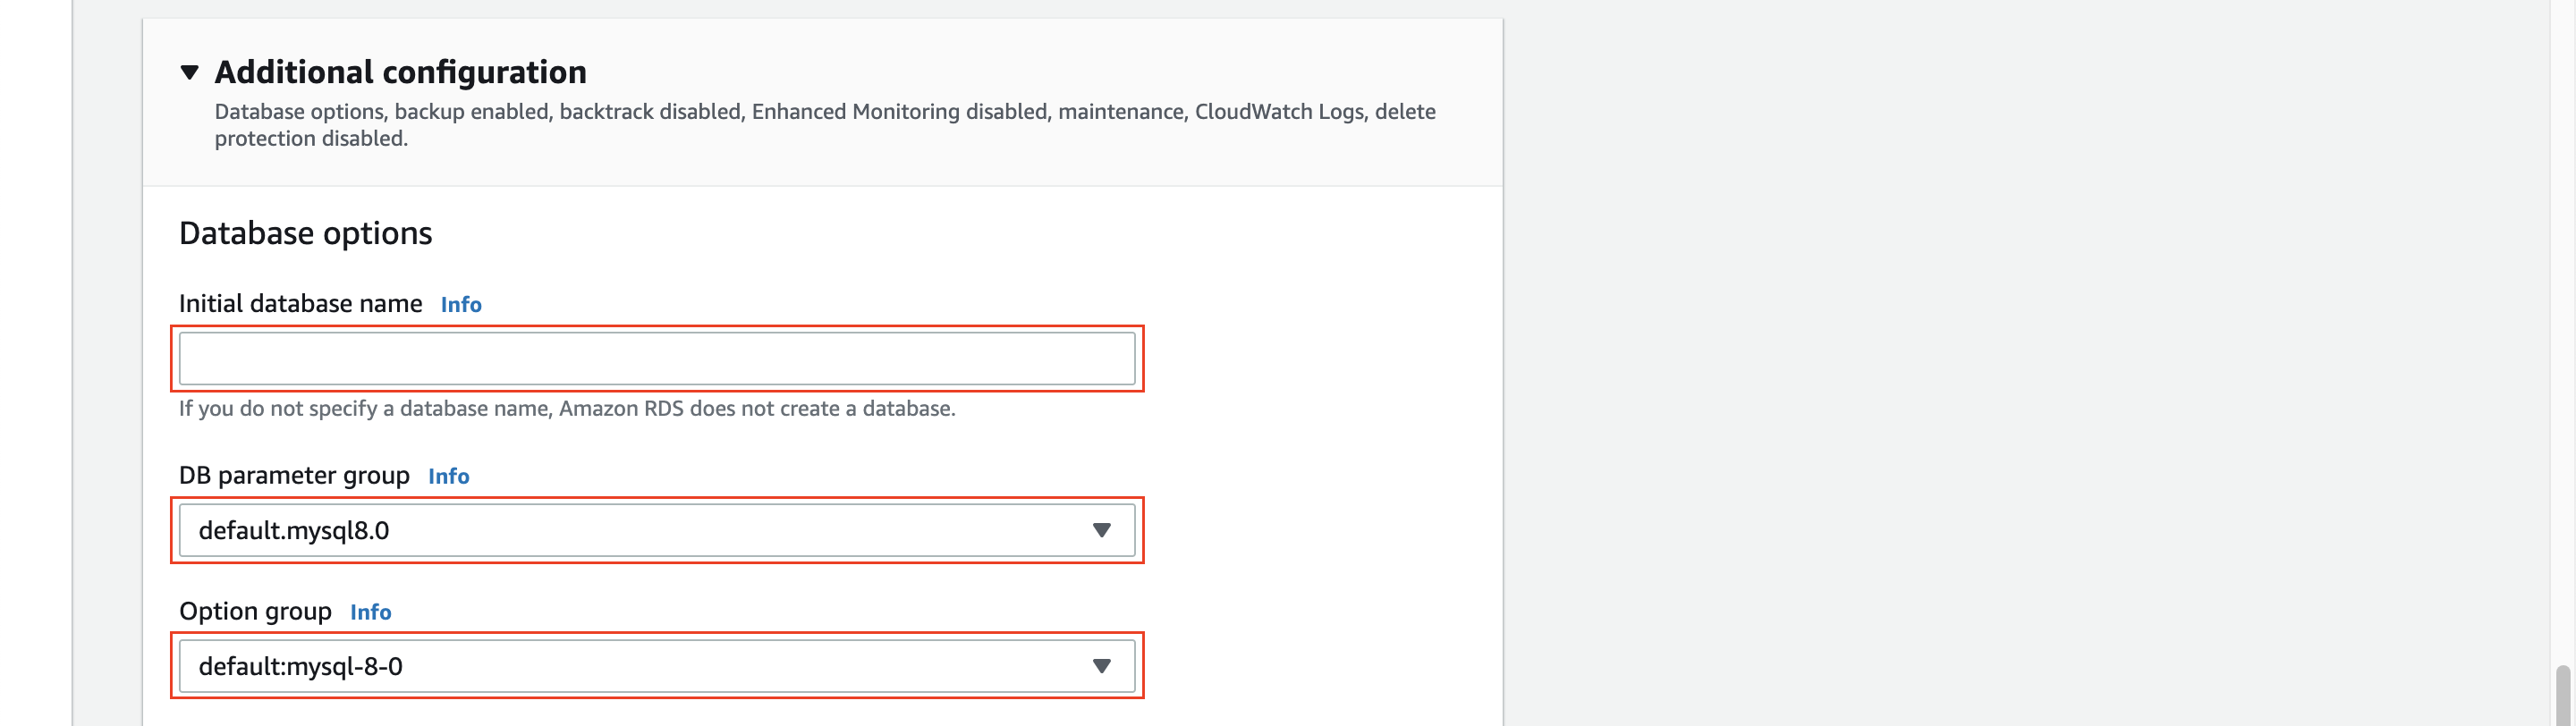
- Under Database options section, you can specify an initial database name, if you provide a name then this database gets created as part of provisioning the database instance, this is optional and you can leave it empty and create database later.
- You can also choose DB parameter group and Option group here, you can only select from the drop down values here. DB parameter group defines the configuration settings you want applied to this DB instance and DB Option group enables optional features such as MySQL Memcached support etc.
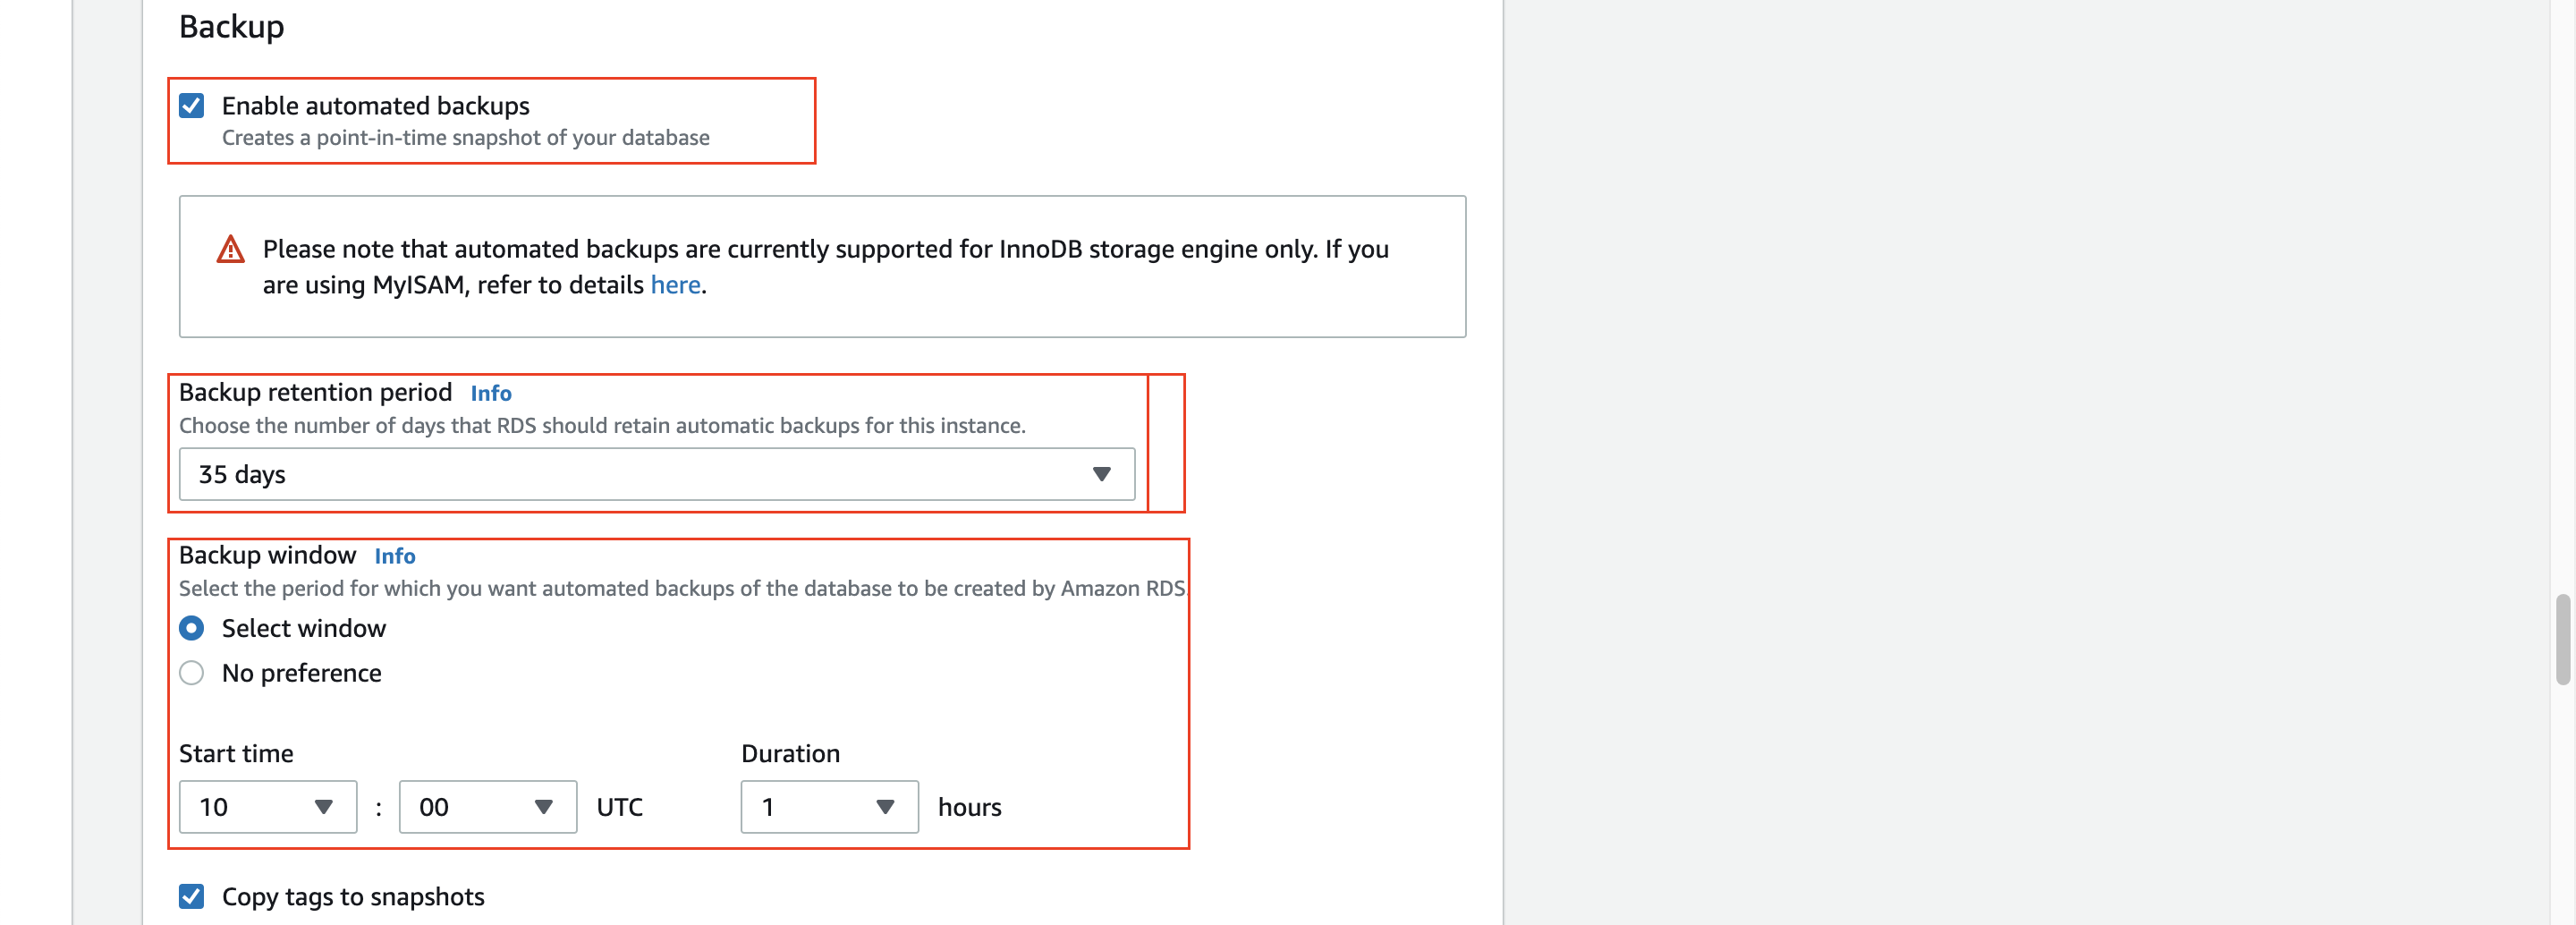
- Under Backup option, you can select whether you want to enable automatic backups of the database or not, retention period for how long you want to keep the backup file, and window period to run the task of taking the database backup.
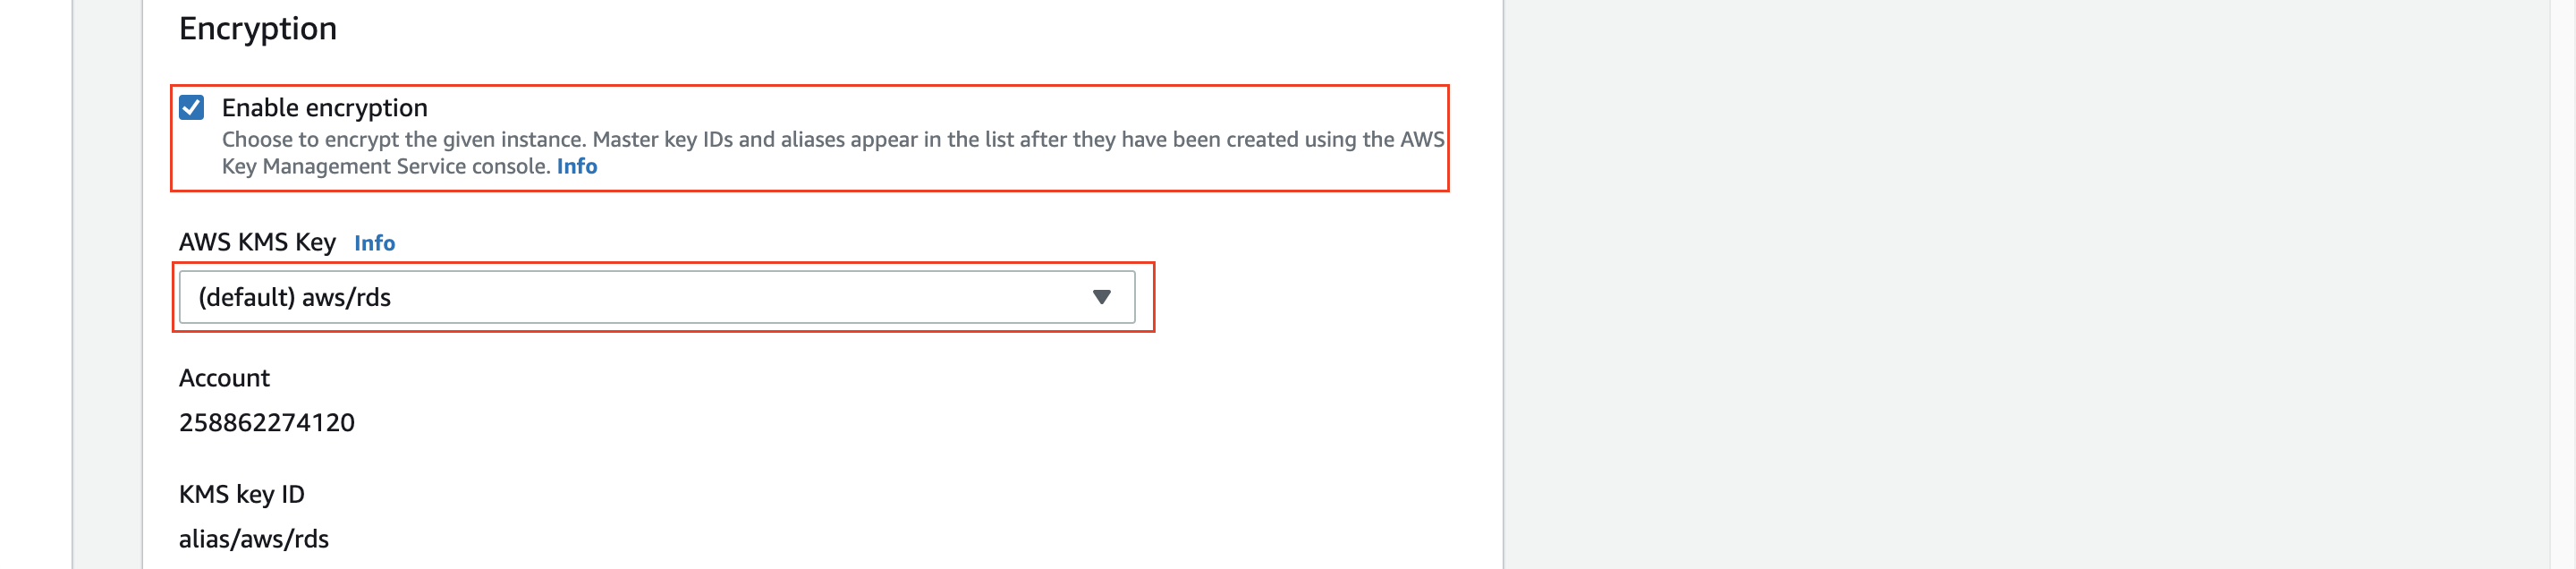
- Under Encryption section, you can enable encryption to encrypt the database, if you select this option then the database file system on the disk will get encrypted using the AWS KMS Key provided.
- Under Performance Insights section, you can enable performance insights, it is an advanced database performance monitoring feature that makes it easy to diagnose and solve performance challenges. You can specify a retention period for how long to retain performance metrics data collected by AWS RDS service.

- Under Monitoring section, you can enable enhanced monitoring, it collects the data such as CPU performance and how different threads or processes are utilizing CPU, and you can specify the frequency to collect monitoring stats.

- Under Log exports section, you can select which type logs you want to export from database instance to CloudWatch, so that you can create alerts, dashboards, and reports etc. Error logs are sent to CloudWatch by default, and you can select other logs types such as Audit log, Slow query log, or General log.

- Under Maintenance section, you can enable auto minor version upgrade if you want to install any minor patches automatically. You can also select a window time for any pending changes or maintenace to be applied.

- Under Deletion protection section, you can enable deletion protection, so that AWS won't let you to delete the database instance incase if you delete it accidentally. If you want to delete the instance for any reason, you need to take this hook off from settings before deleting.

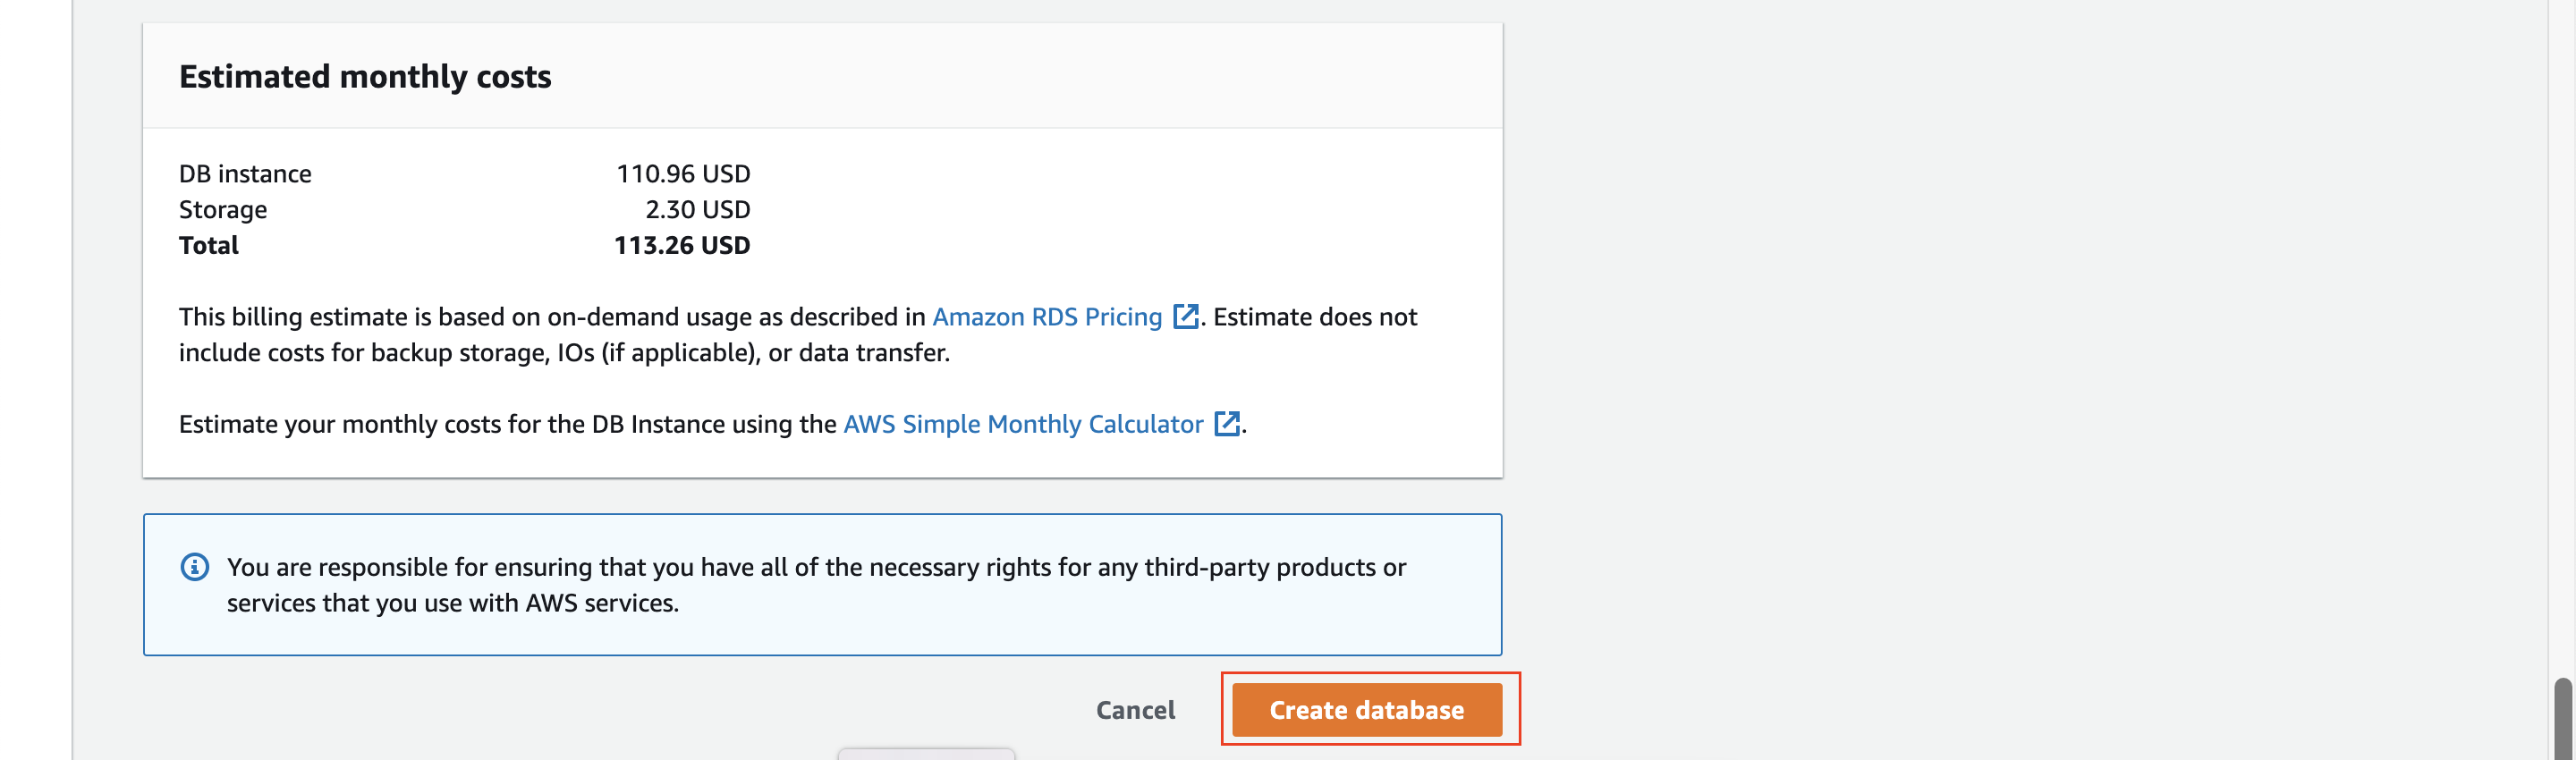
- Once you select all the options for database instance, at the end it will show you the approximate cost per month, so it is very important to select above options carefully to avoid any unnecessary cost. Review all the options and click Create database.